Pupil Finding
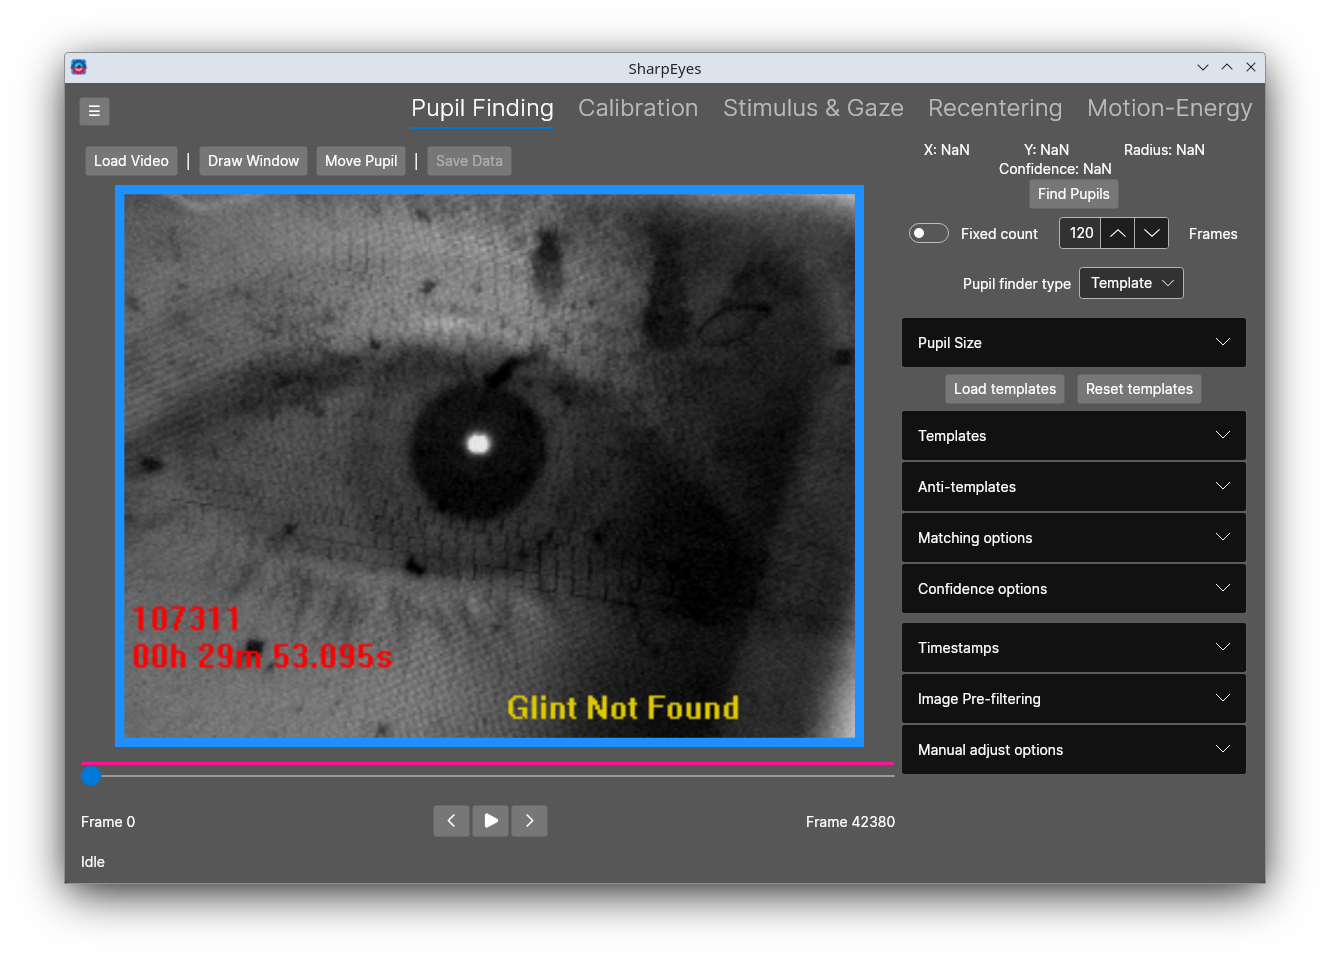
The Pupil Finding tab takes a raw eyetracking video and finds the pupil location in each frame. SharpEyes uses a template-matching approach, where you accumulate correctly-positioned examples that the finder uses to improve over time.
The left half of the window is the video player. The right half is the controls panel.
Workflow
- Open an eyetracking video with the Open Video button or File → Open Video.
- Click Read timestamps in the controls panel under the Pupil Finding tab. For calibration purposes, SharpEyes needs to know the timestamps on each frame. Wait for the progress bar at the bottom to complete.
- Click Draw window in the toolbar, then click-and-drag over the video to restrict the pupil search to a sub-region of the frame. This makes things faster. Click the button again to update the window if needed.
- Click Find pupils to begin automatic detection. Processing pauses every 120 frames by default so you can review and correct errors. Check All Frames to run to the end without pausing — this is not generally recommended. A blue circle overlaid on each frame shows where SharpEyes thinks the pupil is.
- When the video is paused, click Move Pupil in the toolbar to enter edit mode. In this mode, click and drag to move the pupil, and use the scroll wheel to adjust pupil size. Use the left/right arrow keys or the frame-step buttons under the video player to step frame by frame. Any edit made to one frame is propagated to following frames, since the error in the found pupil location is assumed to be stationary.
- Click Add current as template to save the current frame's pupil region as a custom template. When a custom template is added, the idealized default templates are cleared. Accumulating 70–100 templates per video is typical. Check Auto add to automatically add each manually-edited frame as a template.
- Continue through the video, pausing to correct errors as needed. The color bar on the top of the video slider shows progress: pink regions have not been processed, green regions have.
- Save with File → Save. Timestamps and pupil positions are stored as numpy arrays. Templates are stored as a
.dat file (a renamed zip file containing the template images). If Auto save is checked in the controls panel, these are saved automatically whenever pupil finding is paused.
When templates from early in the video stop working well for later sections, use the Use templates dropdown to tell SharpEyes to use only the N most recent templates.
Controls reference
File
| Item |
Description |
| Open Video |
Loads an eyetracking video |
| Load timestamps |
Loads saved timestamps from a video |
| Load eyetracking |
Loads saved pupil locations from a video |
| Load templates |
Loads saved pupil finding templates |
| Save timestamps |
Saves the current timestamps |
| Save Eyetracking |
Saves the current found pupils |
| Save templates |
Saves the current templates |
| Save all |
Save everything to a directory |
| Auto save on exit |
Auto-save anything in memory on window exit |
| Item |
Description |
| Stimulus view |
Opens a window to show the gaze position overlaid on the stimulus video (see Stimulus & Gaze) |
| Button |
Description |
| Open video |
Opens an eyetracking video |
| Draw window |
Enter draw-window mode to select a sub-patch of the video to search for pupils. Click again to exit. SharpEyes also auto-exits when a window is drawn. |
| Move pupil |
Enter edit-pupil mode. Click and drag the pupil to move it; scroll to change pupil size. |
Video player
| Element |
Description |
| Arrow buttons |
Go one frame forward or backward |
| Play/pause button |
Plays the video with existing pupil positions. Does not run pupil finding. |
| Lower left text |
Shows pupil position and radius in frame coordinates. Confidence is the correlation of the best template match; 0 is no confidence, 1 is full. |
| Show filtered video |
If checked, displays filtered frames instead of raw frames. |
Controls panel
Pupil Finding
| Control |
Description |
| Read timestamps |
Reads timestamps from the video |
| Load timestamps |
Loads saved timestamps |
| Reset |
Resets all parameters |
| Auto save |
If checked, timestamps, templates, and pupil positions are auto-saved to the same folder as the video whenever anything changes |
| Find pupils |
Finds pupils in the next N frames. When pupil finding is in progress, changes to a Cancel button. |
| All Frames |
If checked, Find Pupils runs to the end of the video instead of the next N frames |
| Step back |
Go back N frames |
| Min/Max radius |
Minimum and maximum pupil radius in pixels to search for |
| Pupil finder type |
Which detection method to use. Currently only "Template" is implemented. |
Template pupil finding options
| Control |
Description |
| Add current as template |
Add the frame region under the current pupil location as a custom template |
| Auto add |
Automatically add manually-edited frames as custom templates |
| Reset to default templates |
Clear custom templates and revert to idealized templates |
| Use templates |
Choose to use all templates or only the last N templates |
| Pause when confidence is below |
Automatically pause pupil finding if confidence falls below a threshold averaged over N frames |
| Prev / Next |
Display the previous or next template |
| Delete template |
Remove the currently shown template |
Image Pre-filtering
Filters applied to raw frames before pupil finding. Filtering is generally unnecessary when using templates but may help with other methods.
| Control |
Description |
| Bilateral blur |
Bilateral blur size |
| Sigma color |
Color width for the bilateral blur |
| Sigma space |
Spatial size for the bilateral blur |
| Median blur |
Median blur size |
Manual Adjustments
When you adjust a pupil position, the position in following frames is also adjusted.
| Control |
Description |
| Linear |
The delta applied to this frame is linearly faded over the next N frames |
| Exponential |
The delta applied to this frame is exponentially faded with a time constant of N frames |
| Automatically enter pupil edit mode on pause |
If checked, edit mode is automatically enabled when pupil finding is paused |
Hotkeys
| Key |
Action |
| Q |
Step back one frame |
| W |
Step forward one frame |
| E |
Add current frame as a template |
| R |
Remove the currently displayed template |
| Shift+E |
Add current as an anti-template |
| Shift+R |
Remove the currently displayed anti-template |
| F |
Find pupils |